Project Ohka
- Patrick Phillips
- Feb 24
- 3 min read

Project Ohka: Recreating the Instrument Panel of the Yokosuka MXY-7

I’m pleased to announce a new long-term build: Project Ohka.
This project centers on a detailed recreation of the instrument panel from the Yokosuka MXY-7 Ohka Model 11, developed in 1944 for the Imperial Japanese Navy. Conceived during the final phase of the Second World War, the Ohka or “Cherry Blossom”, was a purpose-built, rocket-powered, manned anti-ship weapon intended for attacks against Allied naval forces in the Pacific.


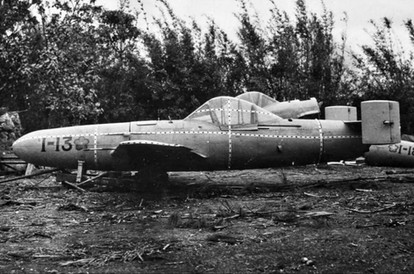

The Model 11, the most widely deployed variant, carried a 2,600 lb high-explosive warhead and was powered by three solid-fuel rocket motors. Released from a carrier aircraft, most commonly the Mitsubishi G4M “Betty,” it could exceed 700 mph in its terminal dive. While its speed made interception in the final seconds extremely difficult, its short range left the vulnerable carrier aircraft exposed. Approximately 800 were produced, though operational success remained limited.
One of the best surviving examples of the Model 11 is preserved at the National Museum of the United States Air Force at Wright-Patterson Airforce base, Ohio. The aircraft’s preserved cockpit and the museum’s excellent high-resolution photography provide a rare opportunity to closely study one of the most specialized aircraft designs of the war.
The Plan

Using high-resolution reference photography from the Air Force Museum and other vetted sources, I have begun scaling the original instrument panel using fixed photographic reference points to generate accurate working blueprints. Establishing proportional accuracy at this stage is critical; the Ohka’s cockpit is compact, and minor dimensional errors compound quickly.
With scaled drawings in place, I’ve started producing precise 3D models of each instrument housing and panel component. These digital models are then translated into high-resolution 3D-printed parts. Prototype work has already begun, including early instrument bodies, compass components, and layout test fitting.

Once final dimensions and assembly methods are confirmed, the project will move into two primary areas of focus:
Functional indicator lights and switches
Faithful reproduction of labels, markings, and surface finishes

The goal is not merely to create a static display, but to produce a panel that conveys the mechanical character of the original cockpit. While the Ohka’s instrument panel was undeniably spartan, it still required essential switches, lights, and indicators. Recreating working examples of these elements moves the build beyond visual approximation and toward a practical study of how simplicity, necessity, and mission shaped every design decision.
Why This Project Matters
The Ohka represents a sobering intersection of aeronautical innovation and wartime desperation. Its cockpit layout reflects a singular mission profile: minimal instrumentation, essential controls, and a focus on terminal performance. There is no excess. Every component served a defined purpose.
By reconstructing the instrument panel with careful attention to proportion, function, and finish, I hope to better understand the engineering philosophy behind it while preserving a tangible element of material history through research and craftsmanship.
Follow Along
Project Ohka will be documented step-by-step over the coming months. I will be sharing:
Behind-the-scenes modeling progress
Prototype testing and material selection
Electrical layout and lighting integration
Finishing techniques and subtle aging
Historical notes uncovered during research
From raw reference image to completed replica, this will be a deliberate and transparent build process.
If you have technical documentation, reference material, or period photography related to the Ohka, I welcome the conversation.

Project Ohka has officially begun.


Comments